Tuesday, May 31, 2011

Grow, Eat, Enjoy - Asparagus


While opinions vary on what constitutes a good diet, everyone agrees on the benefit of freshly grown food. Whether you grow it yourself, or pick it up at a farmer's market, the quality of food right off the plant is unbeatable.

Nothing says spring time to me then asparagus. It is also one of those vegetables that benefits from being freshly picked. If you've only had frozen or canned asparagus, you haven't yet eaten asparagus.
I know everyone doesn't like asparagus. I'll warn you, at our house, you don't say you don't like something, you just have not yet learned to like it. I tell the children to eat a bite or two at every meal, and they will soon like it. So far, three children have proved me right on asparagus and the two year old doesn't yet count. (And yes, I fully admit that my personal food dislikes are because I never learned to like them. And I never intend to give squid, sushi, or coffee a fair chance!)

Grow

Asparagus is one of the cheapest easiest vegetables to grow. Six years ago we bought 25 plants for $10.50. The first two years we harvested very little as we waited for the plants to become established. Since then we have had about a six week harvest each spring. In colder weather I pick every other day. In warmer weather, I pick every day. Each picking is one or two pounds.

I don't know exactly how much we pick but VERY conservatively, I'd say that we pick 30 lb a year. The market near us sells asparagus at $4.00 a pound. So at the very least, we are picking $120.00 worth of asparagus a year. After the initial investment of plants, we have had no further expense. Asparagus is a perennial and can produce for many many years. See why I call it one of the cheapest vegetables to grow?

The labor spent to grow asparagus is also minimal. Harvesting asparagus is as simple as cutting it off close to the ground, trimming off any tough ends and preparing to eat. Sometime in June, the asparagus stalks become thinner. When they are only as thick as a pencil, I quit picking and allow the stalks to grow into huge ferny plants that are rather pretty. We keep the plants mulched to avoid weeding throughout the summer.

In the fall, I cut down all the stalks, add manure or compost to the bed and cover with a thick layer of mulch, either grass clippings or leaves. Nothing else needs done until the warm spring air awakens the plants to push out new stalks.

The only pest I've had to deal with is the asparagus beetle which lays tiny black eggs along the stalk. If I see the beetle on the stalks, I squash them. Otherwise, I wash off the eggs and they don't really do much damage. I do remove the stalks far from the bed in the fall in hopes to keep any overwintering beetles away from the patch.

Eat 


Hands down, our favorite way to eat asparagus is Stacked Asparagus.

Other favorites
Skillet Asparagus


Sausage Asparagus Skillet


Great Green Vegetable Pasta

Crustless Quiche with Ham and Asparagus

Asparagus is also known to show up on pizza, in a wrap and on a salad at our house. We like asparagus. Need I say more?

I don't like frozen asparagus, preferring to eat it several times a week when in season, then turning to other vegetables the rest of the year. I do freeze a couple bags for a pot of asparagus soup in the winter. My sister-in-law just shared a yummy version with me. When I try her recipe, I'll share it with you.

Now it is your turn...
How do you do like asparagus?
Any other growing tips?

Monday, May 30, 2011

The Path of the Paintbrush

It is Monday morning, time for another house addition update. I can't believe anyone reads these posts. And I LOVE all your ideas for organizing our mud room. I can't wait to get out the sketch paper and start drawing out some plans!

I'm not going to go through a day by day "this is what we did when" this week. The general layout of the week was, get the children down for their nap in the afternoon and paint. Put the children to bed at night, and paint. I always said I was a night person and it was fun to work with Ed, but staying up late every night (and getting up early every morning) wasn't fun by the fourth day. By Thursday night when we put on the last coat of paint, I was ready for a celebration - but chose to just fall into bed.

But all the wall painting is finished. Next is the trim, and more painting!

After long stewing about paint colors, here is the final choices. It is hard to get a photo that truly shows the real color.

Our kitchen is a deep chocolate brown. We chose one shade lighter for the "big room" with white wainscoating.


The dining room has no windows and I was scared to paint it that dark, so it is one shade lighter yet.


When you stand at one end of the room, you see three shades of brown-tan. Maybe that is weird, but I like it.


The mud room is green. I think it is too dark, but we had this paint left over from another project and just decided to use it. I wish I would have dumped in some leftover white paint to lighten it up. But with white trim and coats hanging, it might not be bad.


On Saturday Ed spent the day working on the chimney. Our five year old hauled bricks to him, moving a stack one at a time from one board to the next until they were high enough. He took a good nap after all that work!


Now it is Monday morning and Ed is already back to brick laying. We had an early start on the morning even if it is a holiday since we slept out in the tent with the children last night. The girls woke us before 6:00 with shouts of "there is a huge turtle outside our tent." Sure enough a very large turtle was digging in our garden. Large turtles usually are snapping turtles but I ran to the house for the reptile guide for positive identification. Snapping turtles are hated (among other things) for eating baby ducks.

Too bad there is no photographic evidence. I'm sure you'd love to see four pajama clad children gathered around watching me try to lure a big turtle to bite a stick and extend his neck so that Ed could decimate his head with his huge ax. We told the children we'd have snapping turtle soup for breakfast over the fire. They preferred eggs and sausage.

Saturday, May 28, 2011

Question - Mud Room

Life has been a little crazy here. We actually had some rain free days this week. When I wasn't painting, there was always garden work. Blogging hasn't been high on the list but I wanted to jump in quick and ask for some advice. Maybe later today, I can write one of the posts that is rattling around my head.

I'd love to have some ideas on how to make the best use of our new mud room. It is small (just over 6 foot by 5 foot) - a glorified closet really.

A door opens up to the porch, hopefully the direction the children come in to drop their shoes here.


In the other direction, you see the steps down to the basement to my laundry area and the doorway into the dining area and our new "big room". And a shoe pile already in progress!

On the must list is:
Lots of hooks, both high and low
Shelves for containers of gloves, hats, etc.
A place for balls, bike helmets, etc.
A bench to sit and pull off shoes
Shelves for shoes and boots

If you have any suggestions, photos for inspiration, even good websites with ideas, please share.  I don't normally visit interior design/decorating sites since it usually just promotes discontent in my lack of decorating ability. But now I wish I had some good sources of inspiration.

Thanks!

Wednesday, May 25, 2011

Oatmeal Honey Sourdough Bread

This is another variation of the soft sourdough bread I shared last week. This recipe is almost identical except for the addition of oatmeal which adds a slight texture. It is excellent for a loaf bread but also makes a lovely free formed loaf. Try using the dough for sandwich rolls. You'll want to skip the burger and just eat the bread!


Oatmeal Honey Sourdough Bread

2 cups active starter (19 oz)
1 cup milk (8 oz)
2/3 cup water (5 oz)
1/4 cup oil or melted butter (1.5 oz)
1/4 cup honey (3 oz)
1 cup quick oats (3.5 oz)
2 1/2 cup whole wheat flour (12.5 oz)
3 cups white flour (13.5 oz)
3 tsp salt 

Mix all ingredients except salt for 2-3 minutes. Allow the dough to rest for about 20 minutes.

After rest, add salt and knead dough for about five minutes. If dough is too sticky, add slightly more flour but dough should be soft and not dry and stiff. Place in oiled bowl and allow dough to rise for 3-4 hours or until nearly doubled in size.

Divide dough into two pieces and shape into loaves and place in two greased bread pans. If a free form loaf is desired, place on greased baking sheet. Spray with oil and cover with plastic wrap to keep from drying out. Allow to rise for 2-3 hours.

When dough has risen, prepare for baking. A nice touch is to brush with egg whites and sprinkle with whole oats. You may slash the top of loaf, or not, if you wish, but I find it rises better when slashed. If baking a free form loaf, you can use the roasting pan method for added humidity while baking.

Bake at 400 degrees for 30-35 minutes. For even browning, turn loaves halfway through baking time.

Check out  Yeast Spotting for  more bread inspiration.

Monday, May 23, 2011

Dust, Paint, and Wood Shavings

Continuing to share the steps of a home addition project.

On Monday evening, after a crazy time of chasing the two steers, Ed stayed up late and finished the fireplace. I love the result!


Tuesday was the day I was waiting for. No, not my birthday. I mean, yes, it was my birthday, but by the mid-30's, birthdays are just not that exciting!

No, what I was really looking forward to was the removal of our dining room wall to open up to the new addition. I knew it would be lots of dirt, dust and inconvenience, but it would be one step closer to being done with this project. I told one friend that it was somewhat like being pregnant. Eventually, I am so tired of being pregnant and so eager to hold my baby that I'm willing to go through labor.

All the furniture was moved out of the dining room and a double layer of plastic was put up in the kitchen. This shrunk my kitchen space and cut off the entrance to the back door and the basement. I go to the basement frequently as my laundry, freezers, food storage, and,  this week, even 28 baby chicks are down there. Now I had to go out the front door and down around the garage door to get to the basement. I couldn't believe how often I stood in my kitchen confused on where I was going and how I was to get there. Maybe a sign of advancing age?


But the plastic kept almost all the dust out of the kitchen when they tore out the patio doors and the dining room wall.

Ed asked my brothers to work several days on the project in hopes that the house wouldn't be in this crazy upheaval for too long. I appreciate his concern for his wife's sanity.

Some of the activities on Tuesday...


Drywalling.


Putting in the door.


Building the mantel.


Putting up wood bead-board paneling. Wood is more expensive then dry wall but this was one of my choices in hopes of having a practical room that can withstand lots of use (and abuse). I can't believe how bad the dry wall in our living room looks.


In the evening, my parents brought supper over for my birthday. There was no room in the house to eat, the rain ended the plans to eat outside, so we swept the sawdust in the addition and ate there. It was fun to eat around the new fireplace and imagine many more great family events in that room!

On Wednesday, I left the house. Being cooped up in this crowded house (did I say that it was raining nearly every day this week?) with loud sawing and hammering as background noise, was taking it's tole. I'm not sure what the men did all day. The electician was back, and more dry wall was finished. The insulation in the ceiling was blown in and some boards were planed.


The mud room was paneled.


The porch posts were placed.


Thursday was more of the same dry wall and paneling.


Work on the porch continued.


In the evening, Ed  placed bricks around the porch posts.


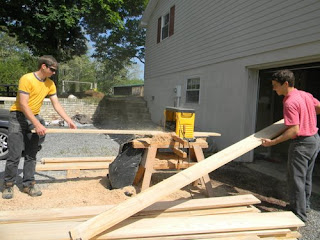
Friday, the final sanding of the dry wall was finished. The porch was nearly completed. The wood for the porch posts, mantel and for wrapping the porch beams is walnut. The lumber all came from my Dad's woods. It was sawn  into lumber by a cousin's sawmill and dried at another cousin's kiln. If you know what walnut costs, you can appreciate the huge cost savings!

With the dry walling finished, I could finally help with this project. I'm no carpenter but I can vacuum up the dust and wash down the walls in preparation for paint. Part way through the afternoon, my daughter mentioned that I had a lot of gray hair and looked "old". I know I'm turning gray and just had a birthday, but I didn't think it was THAT bad. But later when I happened to glance at myself in the mirror, I discovered I really had turned gray...from dry wall dust! I'm rather thankful that most of it could wash out and my daughter and I shared a laugh over how she had been fooled into thinking it was my real hair color!


After we put the children to bed, Ed and I painted on the primer. Ed's brother gave us this paint stick EZ Twist. The paint is sucked up into the handle and out into the roller. It was a huge time saver and by midnight we had the whole room primed. A late night was worth it to not have the help of children while painting. In our younger (and more foolish) days, staying up til midnight on a Friday night wouldn't have been thought unusal and we would have had less to show for it!


On Saturday, Ed laid more brick around the porch posts and I painted a few spots on the wall to test paint color. I'm so indecisive when it comes to paint color. I always plan to step out into a bolder color then chicken out and choose some strain off cream/off-white! I liked this paint shade well enough to paint the dining room during the children's naptime. The new room is still in the undecided stage.  I think I'll be getting another paint sample before we make up our mind. Ed finished painting all the ceiling. Even with his snazzy paint stick, the vaulted ceiling was no fun!


Ed's nephews planed a huge stack of lumber, also from my Dad's trees which will be turned into the trim. There is advantages of being a twin! This is a two man job and would have taken Ed a ridiculous amount of time alone. Can you tell we are grateful for family? We are going to owe some people big time by the time this project is done!

So that is one week in the life of a home addition project!

Friday, May 20, 2011

Sausage Aparagus Skillet


Sausage Asparagus Skillet
from Simply In Season  (the best cookbook of seasonal recipes!)

This is a new (to me) recipe that I just found that we think is a winner. I love that it takes only one pan for an entire meal! This is one of those meals that I love my extra deep cast iron Griswold skillet that came from Ed's grandmother. I use this pan every day!

1 lb sausage
1 onion, chopped
Fry together until lightly browned.


4-5 potatoes, chopped
1/2 cup water
salt and pepper, to taste
Add, to sausage, cover and simmer 10 minutes.


1 lb asparagus, cut into 1-inch pieces
Add and simmer for 10 minutes or until vegetables are soft. If needed, add extra water.


1/2 cup cheese, shredded
Sprinkle on top.

Thursday, May 19, 2011

Soft Sourdough Bread

Are you ready to bake some sourdough bread?

One of the questions I get most frequently is how to have a soft loaf bread. Many sourdough bakers appear to have issues with dry crumbly bread.

I understand the frustration, because I've had my share of dry bread that went straight to bread crumbs. But there is hope because I've found several recipes that have been never fail for me. Since a soft loaf bread seems to be the goal of many readers, I'll start with those recipes.

The first three recipes are almost identical. They are all mixed and baked on the same day following the same directions. The only slight difference is in the ingredients.

The first bread contains a mixture of white and whole wheat flour. I found this recipe a great one for cinnamon raisin bread as well. Just remember to feed your starter the night before baking to have it active and happy for baking day.


Soft Sourdough Bread

2 cups active starter (19 oz)
1 cup milk (8 oz)
1/2 cup water (4 oz)
1/4 cup oil or melted butter (1.5 oz)
1/4 cup honey (3.5 oz)
2 1/2 cup whole wheat flour (12.5 oz)
3 cup white flour (13.5 oz.)
3 tsp salt


Mix all ingredients except salt for 2-3 minutes. Allow the dough to rest for about 20 minutes.

After rest, add salt and knead dough for about five minutes. If dough is too sticky, add slightly more flour but dough should be soft and not dry and stiff. Place in oiled bowl and allow dough to rise for 3-4 hours or until nearly doubled in size.

Divide dough into two pieces and shape into loaves and place in two greased bread pans. If a free form loaf is desired, place on greased baking sheet. Spray with oil and cover with plastic wrap to keep from drying out. Allow to rise for 2-3 hours.

When dough has risen, slash the top of the loaf. If baking a free form loaf, you can use the roasting pan method for added humidity while baking.

Bake at 400 degrees for 30-35 minutes. For even browning, turn loaves halfway through baking time.

Variations: We really like this doughs for a multipurpose dough. Some of the ways we've enjoyed it were as cinnamon raisin bread and dinner rolls.

For more bread inspirations, check out Yeast Spotting.

Wednesday, May 18, 2011

Author Interview - Stephanie Leinbach

Yesterday I shared a little about Light My Candle, Prayers in the Darkness of Miscarriage by Stephanie J. Leinbach. Stephanie graciously agreed to share a little bit about her life and book.


Can you tell us a little bit about yourself and your family?

My husband and I have been married for almost 6 years. We are blessed to have two little girls in our life. Jenica just turned four and Tarica is 18 months. We have two children who have gone to live with our Heavenly Father. My husband is an appliance service technician, and I am a stay-at-home mom.
We live in a lovely mountain valley in Central Pennsylvania and attend Tyrone Mennonite Church, a recently established outreach congregation.

What prompted you to write a book and share your story?
 I didn't plan to write a book on miscarriage and certainly my story is not so unique, for many women know the pain of miscarriage. I wrote in order to deal with my pain and to give my broken dreams to God. As I shared some of what I wrote with other women, they encouraged me to open myself up on a broader scale. God began to open doors and gave me a burden for those who are grieving the loss of a baby. If I can help someone by putting my heart and soul into the pages of a book, then I want to do it, regardless of the fear that accompanies opening myself up in this way.

If you had one thing to share with a woman grieving a miscarriage, what would it be?
 Grieve. Allow yourself to mourn the loss of your baby. However, while you grieve, find something to keep your hands busy. With the circumstances surrounding the loss of our first baby, I was too physically weak in the first few weeks to do anything productive. This gave me too much time to focus on my pain. Looking back, I see how that prolonged my grieving process.

How can one best encourage a friend who is grieving a miscarriage?
There is no one-size-fits-all answer to this question. We are all unique, and we all respond differently to grief. But there is one mistake made frequently by those who wish to comfort: our desire to fix the person and the problem. She says she is angry at God for taking her baby; I start preaching God's goodness and how we need to accept what happens as God's will. She says she struggles with envy toward those who have babies; I remind her of all the wonderful things she does have. She says she fears pregnancy; I say brightly, "Oh, trust in the Lord." She says she feels like she failed as a woman; I tell her it wasn't her fault, and she needs to stop telling herself that. Am I giving her room to grieve? Or am I rushing her toward the healing I wish her to know? It seems everything these days is high-speed, but grief is not. Negative emotions are part of the grief package. If I tell her too often not to feel what she can't help feeling, she will stop talking to me about it

Allow her to express her pain. Listen. Ask questions. But don't push her toward healing. God and Time are the true healers.

Thanks so much, Stephanie, for sharing your pain and God's healing through your book. I'm praying along with you that  Light My Candle can be a blessing to many women. 

Stephanie gave me permission to share an excerpt from the book with you. I had no idea how to choose a favorite. I've changed my mind half a dozen times. But here is one of Stephanie's poems which reminded me of my first hollow Mother's Day.

An Empty Motherhood

Oh, God,
     I am a mother,
                     aren't I?
Even though my child
    lived but weeks
          beneath my heart
and now dwells 
          within Your arms,
that still makes me a mother,
                    right?
I am a mother who
     never held her little one,
           never whispered a prayer at a bedside.
I never heard my baby cry
           because my baby has gone
     to a place of no tears,
                                no pain,
                  not even a prayer,
                              for God is right there.
I can only cry,
                     and hurt,
              and pray.
God, I know You're here,
     but I wish I could see You,
                as my baby does.
I am a mother- 
                 a mother without a baby;
     I must pray for strength
                          to move on.
I'm letting my baby 
                  rest in Your arms.
Thank You, Lord,
                 that there's room enough 
                                for me there, too.

Excerpt from Light My Candle, Prayers in the Darkness of Miscarriage by Stephanie J. Leinbach

Contact Stephanie at lightmycandle@abcmailbox.net to purchase Light My Candle. Or visit her blog to enjoy more of her writing.


Tuesday, May 17, 2011

Giveaway - Light My Candle

Last week was Mother's Day. The day that we celebrate all the love and sacrifices our mothers have made for us through the years. Like most women who become moms themselves, it is only in the last years that I've truly come to realize how much my mother did for me.

But every Mother's Day, I can't help but remember my first Mother's Day. The painful day when I sat in church and choked back tears with the memories of my little baby who had came and left so quickly, but left behind a huge hole in my heart and empty arms.

Even though my house is now full of noise and laughter, it doesn't erase the memory of our first baby, the one who never took the first breath. In the last couple years, so I've known so many ladies who have walked through the valley of miscarriage and still-born death. My heart goes out to those who feel alone in their struggle to find joy after their dreams were dashed.


When a Home Joys reader asked if I would review her new book, Light My Candle, Prayers in the Darkness of Miscarriage, I jumped on it. Stephanie J. Leinbach shares the tears on the journey through two miscarriages.

I wish I had this book eight years ago when struggling through my own miscarriage. I found resources on miscarriage were rare, especially ones that pointed to the Lord as the healer of broken dreams. I'm so glad that Stephanie opened up her heart and peeled back the bandages to share the road of pain and healing in her life. Of course, every woman grieves differently, but my experience echoed Stephanie's in many ways. I think I was in tears by the second page. One of the pains of miscarriage is the loneliness. The loss is not felt by anyone but the mother, and maybe her husband. Knowing that another walked this road of heartache, is immensely encouraging.

Most of Light My Candle is written in a poetic free-verse style. I found the book an easy one to read. Though I love to read, I know some women find large chunks of time hard to find. This book was an easy one to pick up and read a short page or two. Stephanie shares chapters on the effects of miscarriage on a marriage, how to give support to a grieving friend, and how to move on after your loss.

I wish there were never women who shed lonely tears with empty arms on Mother's Day. But since there is, I plan to keep a copy of Light My Candle on hand to share. Even if you've never experienced a miscarriage, it would be a good book to read to understand better the emotional pain a friend faces.

To purchase Light My Candle, you can contact Stephanie at lightmycandle@abcmailbox.net You may also visit Stephanie's blog for more of her writings.

Stephanie has also generously offered to share a copy of Light My Candle with a  Home Joys reader. To enter the giveaway, leave a comment on this post. Please give an email address so I can contact the winner. Giveaway will be open for one week.

Come back tomorrow and we'll share a short interview with Stephanie and maybe an excerpt from the book.
(Read interview here.)

I was given a complimentary review copy of Light My Candle, but all opinions in this review were my own. This book was a pleasure to review and I can recommend it from the heart.

Monday, May 16, 2011

One brick at a time

Another week in the addition project.
Monday morning, one of my brothers came to finish the concrete.


First, he washed off the top powder dye.


Then he power washed the concrete.

Finally he brushed on a sealer. Now the true color of the concrete came out. It was sort of a guessing game of what the final result will be. And with concrete there is no changing your mind, unless you want to grind it off and start over! I'm very happy with the way it turned out.


Ed's spare time this week was laying brick in the chimney. I would never recommend anyone tackle a do-it-yourself project like this unless you are willing to give up all your evenings and Saturdays for an undetermined amount of time. Ed acts like he is still enjoying the project.


Saturday was rainy, so he moved inside at the fireplace.

Fewer angles and less brick cutting means this project went quite a bit faster then the chimney.


I've never seen a mason tender in an apron and braids but our daughter was tickled to "help Daddy" by raking out the joints.  Or maybe it was just the fun of standing on the scaffolding!

And speaking of help, our mason neighbor has been incredible. He has lent us scaffolding and other tools but more important, given wise advice. This project would have been impossible without his help.


The fireplace was almost finished on Saturday but Ed ran out of light, time, and energy. More work for another day.

Friday, May 13, 2011

Just a Note

Blogger has had some issues this week. For some reason, I lost the comments on the sourdough waffle post and the post itself went back to the draft folder.

I didn't mean to ignore your comments and appreciate those of you who expressed concern at my absence. We have been crazy busy - or maybe a better explanation would be that there has been other priorities than blogging to take my attention!

I probably don't say it enough - you all are the best! Your visits to this little blog, your comments and words of encouragement just bless my socks off! If I didn't have so many other things to do, I'd love to interact more on your blogs and be better at returning emails. But know that I appreciate you so very much! Thank you!

Blessings,
Gina

Homemade Cookbook for a Daughter

Last year I searched for a cookbook for my daughter. She enjoys helping me cook and I thought that having her own cookbook would be a special motivation.

You all gave me many great suggestions for children's cookbooks. I also tried a cookbook from the library that we enjoyed.

But what I really wanted was our family's favorite recipes in a book. Not that I don't like to try new recipes myself, but when teaching my daughter to cook, I'd rather use the tried and true. How could I teach her to follow a recipe when I was constantly saying "instead of 'this', we will use 'that' and we will mix it 'this' way instead of 'their' way."


So for my daughter's birthday this spring, I took a half size three ring notebook that holds a half sheet of paper. Using photos of my daughter helping in the kitchen, I designed tabbed dividers for the various categories. I printed off some of our favorite recipes using a different color paper for each category. The recipes are kept in the pocket of the binder until my daughter uses the recipe. She then can place the recipe behind it's category.  It was a very easy but meaningful gift.


She loves her cookbook and asks often if she can make something from "her" cookbook. An added benefit was that it encouraged me to go through some of my recipes and find my favorite. I think I had over ten different recipes for biscuits. I find myself reaching for her cookbook just because it is better organized than my recipe stash. Some day I really need to organize my own recipe collection. I didn't put a lot of recipes in her book to start with to keep it from being overwhelming. I plan to add to it in the coming years.


I hope this little recipe book becomes a family heirloom. Since I saved on the computer all the recipes that I printed for her book, it should be simple to print off more copies for my younger daughter - or my sons.


I'd love to hear your ideas for recipe organization.

Wednesday, May 11, 2011

Sourdough Waffles

We love waffles.

Waffle Wednesday has become a family tradition that we all look forward to. More than once, on a Tuesday morning, my daughter has walked out to the dining room table and registered dismay that it wasn't Wednesday yet and there were no waffles.

For the first seven years of our marriage, I made buttermilk waffles. Occasionally I'd try a new recipe but Ed always asked me to go back to my old original. We enjoyed the beaten egg white recipe for a few weeks, but it meant some extra steps that I'm not always excited about so early in the morning.

My husband knows that I just enjoy trying new recipes and honestly want his opinion. A year ago, I first made these sourdough waffles. I thought I'd hear once again "I'll take the normal waffle recipe." But I had found a new normal. I've adjusted, adapted, tried other sourdough recipes and decided this is the winner. I never liked all whole wheat flour in waffles until finding this recipe. I think the overnight soak lightens the flavor, or something.

Come over on Wednesday morning and the aroma of sourdough waffles will greet you at the door. Just don't expect there to be any left for you unless you get here before the children are up!

Sourdough Waffles

2 cups whole wheat flour
1 cup of active sourdough starter
2 cup milk
2 T honey ( I just drizzle some in.)
2 eggs
1/4 cup melted butter
1/2 tsp salt
1 tsp baking soda

In the evening: Mix flour, starter, and milk together. Cover lightly and sit at room temperature overnight.

In the morning: Whisk together the eggs and butter. Mix into flour mixture with honey and salt. Sprinkle the baking soda over the batter and stir in just until combined. The soda should immediately react to the sourdough and become bubbly. Cook in waffle iron. My iron holds one cup of batter and cooks for 3 1/2 minutes.

We love these spread with peanut butter and syrup!

LinkWithin

Related Posts with Thumbnails